Get started now with API Testing (1)
Hello everyone, I am Mai Cuong from RakAPIt Team.
How is everyone doing in the midst of the changes in daily life caused by the new coronavirus?
I sincerely hope that the virus will end as soon as possible so that we can return to our daily lives in peace.
In the last article, I talked about what API testing is and the concept of API testing. This time, let's actually try API testing with your hands.
What do we test?
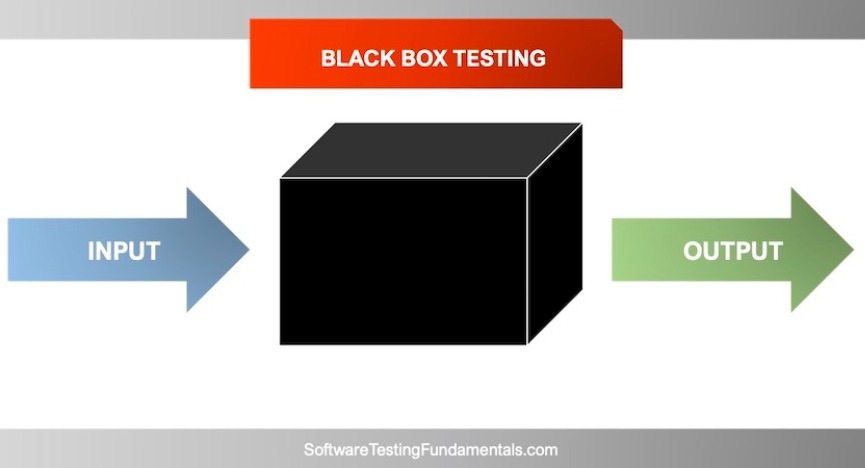
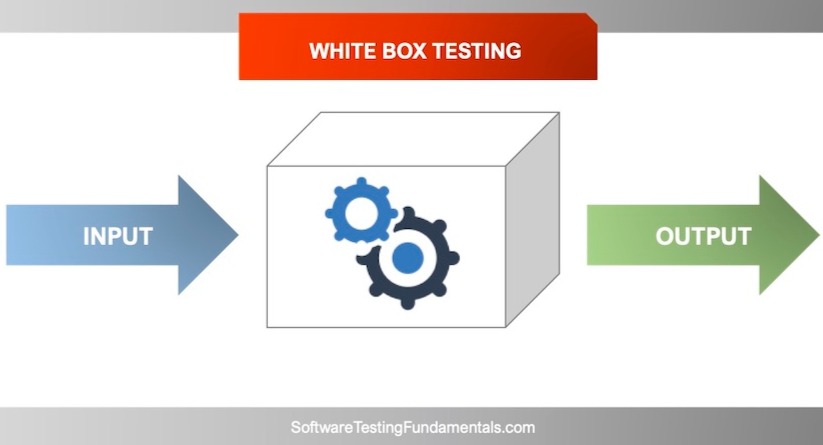
API testing can be done in a variety of ways, such as functional testing, load testing, security testing, etc. When we do API testing, we separate "White Box Testing" and "Black Box Testing" as shown below.
Black Box Testing
Black Box Testing is to check whether the API behaves according to the specifications for input and output values. In short, it checks whether responses are returned as expected for various patterns of Requests.
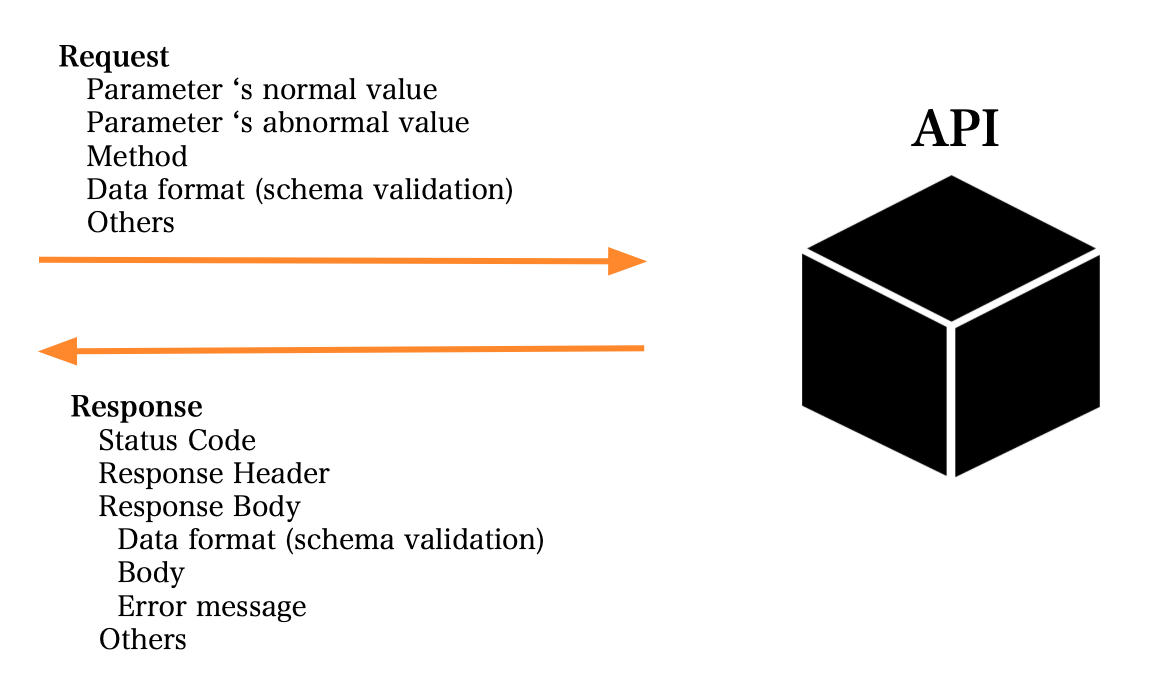
White Box Testing
White Box testing focuses on the content. The contents are not code-based. Code-based testing should be done with unit tests.
As I mentioned in the last issue, I believe the major advantage of API testing is that it allows us to perform coupling tests earlier. White Box Testing here is done in terms of coupling tests. For example, coupling with DB, coupling with other programs, coupling with other servers, etc.

Black Box Testing with RakAPIt
Let's start with Black Box Testing using RakAPIt
First, create a project. We will use Swagger Petstore as a sample Swagger.
The definition can be found here.
https://petstore.swagger.io/
Download Swagger from the above site, go to the Projects screen, and open the Create Project modal. Then, import the Swagger file into the Create Project modal. (https://rakapit.dockyard.biz/projects).

Test Data Generation
Under "Swagger Information" in the lower left corner of the screen, a list of APIs is displayed. This time, the Endpoint at the top is the target for testing. Click "→" on the right to move to Request Spec.

You may have already entered information in Endpoint, Header, and Body. This information is automatically created by taking information from Swagger.
Next, open the Body tab. On the right side is the Body format. On the left side, you will see a list of Parameters defined for the selected Endpoint.

Now, each Parameter will contain a data pattern.
RakAPIt provides a "Test Data Generation" feature that allows automatic generation of test data from Parameter definitions defined in Swagger. Test data is generated from data type, maximum value, minimum value, sample value, etc., using multiple testing techniques such as Equivalence Partitioning Method and Boundary Value Analysis. For example, a Parameter that is of type integer and takes values from 1 to 10 will automatically populate the values 0, 1, 10, and 11.
Although it is possible to generate test data for all Parameters at once, for ease of explanation, we will focus on the three Parameters above. Click the "Generate Data" button and select id, category.id, category.name. Then the data will be added.

Enter normal system data for the other parts of the system.
- name: (string) “doggie”
- photoUrls: (string) “http://swagger.io”
- tags: (array) [{ "id": 0,"name": "pet”}]
- status: (string) “available”
Test Case Generation
We have defined the API and entered test data for each Parameter. The next step is to create a test case.
We will create a test case by combining the data patterns for each Parameter. In RakAPIt, you can choose between all combinations and combinations using the All pairs method. In this case, we will use the All pairs method.
※All pairs method::
A combination test in which all combinations of all levels are entered at least once for all pairs of factors. Test "pair-only combinations" instead of "all combinations".
(Source: https://www.atmarkit.co.jp/ait/articles/1506/11/news013_2.html)
Finally, click the "Create" button to automatically generate the test case.

The following options are available for test case creation.
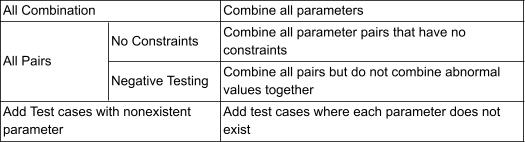
Test cases are also divided into normal and error systems according to the data pattern of the input Parameter. The default response code for normal is 200 and for error is 400. When actually testing, please modify them appropriately according to the API specifications.
Test Execution
Select a test case and press the Run button to execute the test.
The execution environment can be selected between "RakAPIt Server" and "Local Environment".
-
RakAPIt Server
The source is the RakAPIt server. -
Local Environment
The source will be the user's local PC. Select this option for APIs that are not released to the public or APIs that are being developed on a local PC.

In addition, you can output a cURL command script and execute it on the command line.
Assertion Settings
In RakAPIt, you can set up Status Code, Header, and Body assertions as tests.
Status Code assertions are included by default. Header assertions can be compared by specifying the key, and are automatically generated from Swagger definitions; if you want to check a Header that is not defined in Swagger, you can add an additional assertion.
Body assertions include Schema validation and Property assertions.
Schema validation can be generated automatically from the Swagger definition. It validates the entire Response Body format. If you want to verify more individual values, add a Property assertion.

You are now ready to go through the entire process from test data creation to test execution.
In Conclusion
How was it?
Until a few years ago, I used to create test data and test cases with Excel, etc., and then I would throw them to some tool in turn and check the responses visually. It was quite difficult.
However, now, by using RakAPIt, we can save time and effort in various processes, and I think it has become much easier.
In the next article, I will talk about White Box Testing with RakAPIt.
Please look forward to it!
References:
- Swagger Petstore
https://petstore.swagger.io/