Import Postman
RakAPIt supports importing existing Postman Collections to create new projects, instead of building them from scratch. This allows you to reuse your work from Postman and start testing with RakAPIt in just a few minutes.
Export from Postman
Before importing data into RakAPIt, you need to prepare your data in Postman. This step ensures that your collection is ready for a smooth transition.
Postman to RakAPIt Mapping Table
To help you understand how data is converted, please refer to the mapping table below:
| Postman Concept | RakAPIt Equivalent | Notes |
|---|---|---|
| Collection | Project | The entire collection is imported as a single Project, including metadata and settings. |
| Folder | Test Object Name | Nested folders will be merged into the Test Object name. |
| Request | Test Object | Each API request is converted into a Test Object, maintaining its method, URL, and configuration. Unlike Postman's manual testing, the Test Object serves as the core unit for automated testing in RakAPIt. |
| Path / Query Params | Test Object Parameters | Path variables and query strings are automatically mapped as Test Object parameters. |
| Request Body / Headers | Test Object Body & Headers | JSON and Header configurations are preserved within the Test Object. |
| Saved Response / Examples | List of Test Cases | Saved responses (Examples) in Postman are converted into executable Test Cases for the corresponding Test Object. |
| Collection Variable | Project Parameters | Collection-scope variables become shared parameters used across the entire Project. |
| Environment (URL) | Server URL | Base URLs (e.g., baseUrl) defined in Postman environments will be mapped to the Project's domain list in RakAPIt. |
| Authorization | Authorization Settings | Supports conversion for Bearer Token, Basic Auth, and No Auth. |
🎥 Watch: How Data Mapping Works in Practice
See how RakAPIt seamlessly transforms your Postman requests, headers, and variables into executable automation objects.
Export Collection
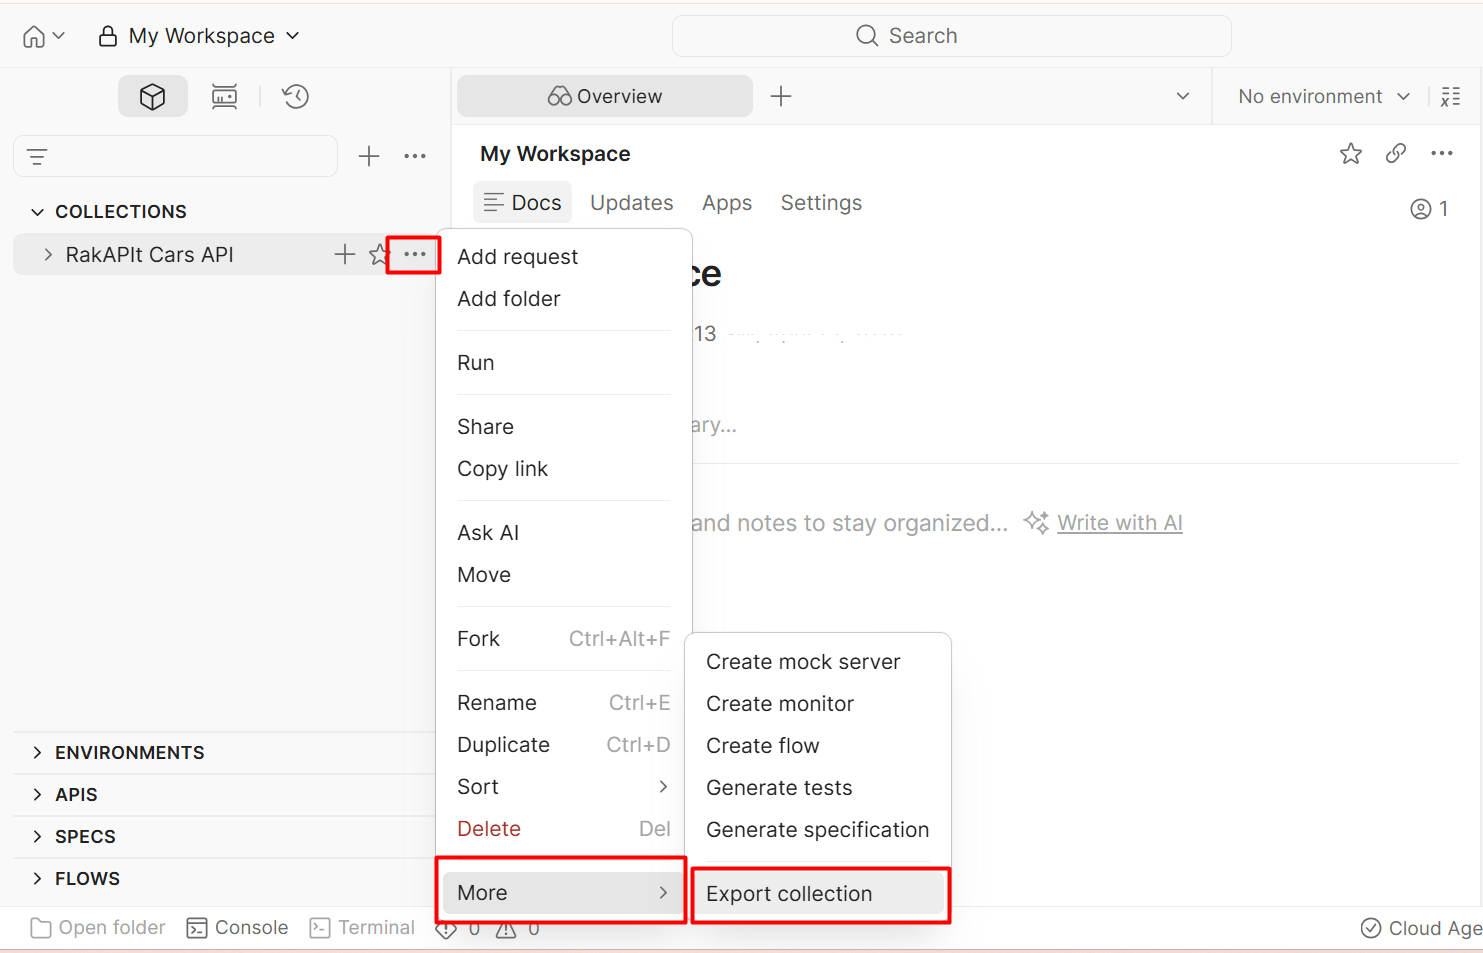
- Step 1: Open Collections in the left sidebar of Postman.
- Step 2: Click the
...icon next to the collection you want to export. - Step 3: Hover over More from the dropdown menu.
-
Step 4: Select Export to open the configuration dialog.
-
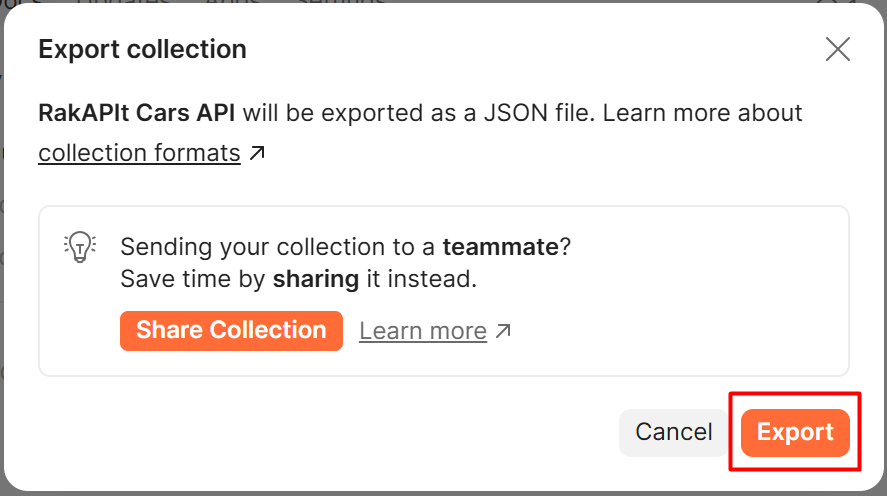
Step 5: Click the Export button in the popup and save the JSON file to your computer.
Key Differences: Postman Request vs RakAPIt Test Object
| Aspect | Postman Request | RakAPIt Test Object |
|---|---|---|
| Main Purpose | Execute APIs and debug manually | Define APIs for automated testing |
| Response Storage | Saved Responses (manual) | Automatically stores results after each execution |
| Testing (Scripts) | Custom Pre/Post script (manual coding) | Built-in assertion mechanism, no coding required |
Import into RakAPIt
When initializing a new Project, RakAPIt allows you to use a Postman file (Collection v2.1 format) to quickly sync and expand existing test scenarios into the newly created Project.
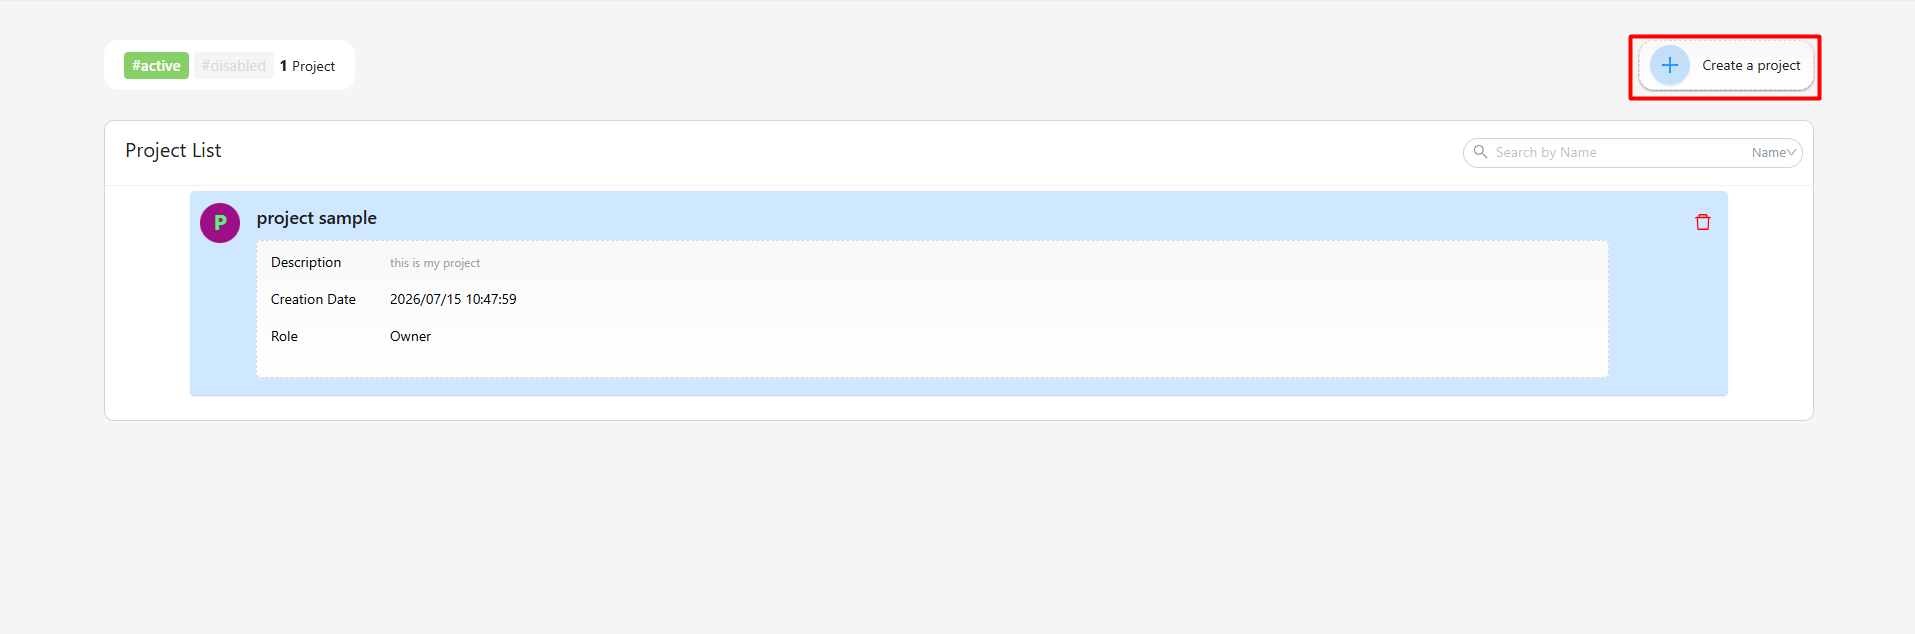
Create a Project with Postman Data
-
Step 1: Click on the Create a Project tab.
-
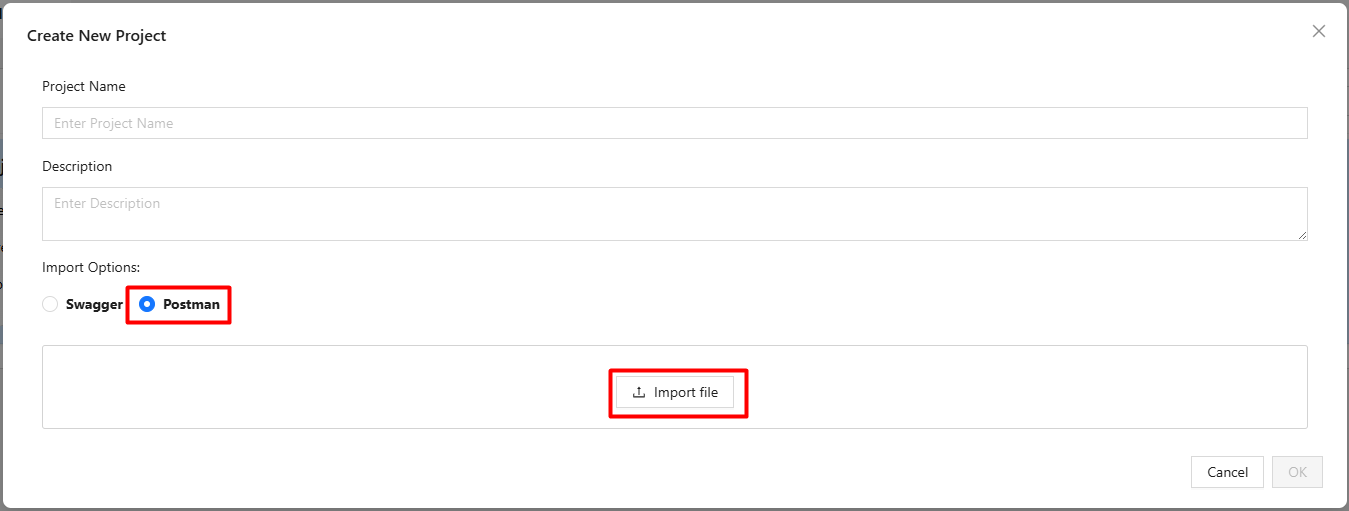
Step 2: Select the Postman option and click Import file.
-
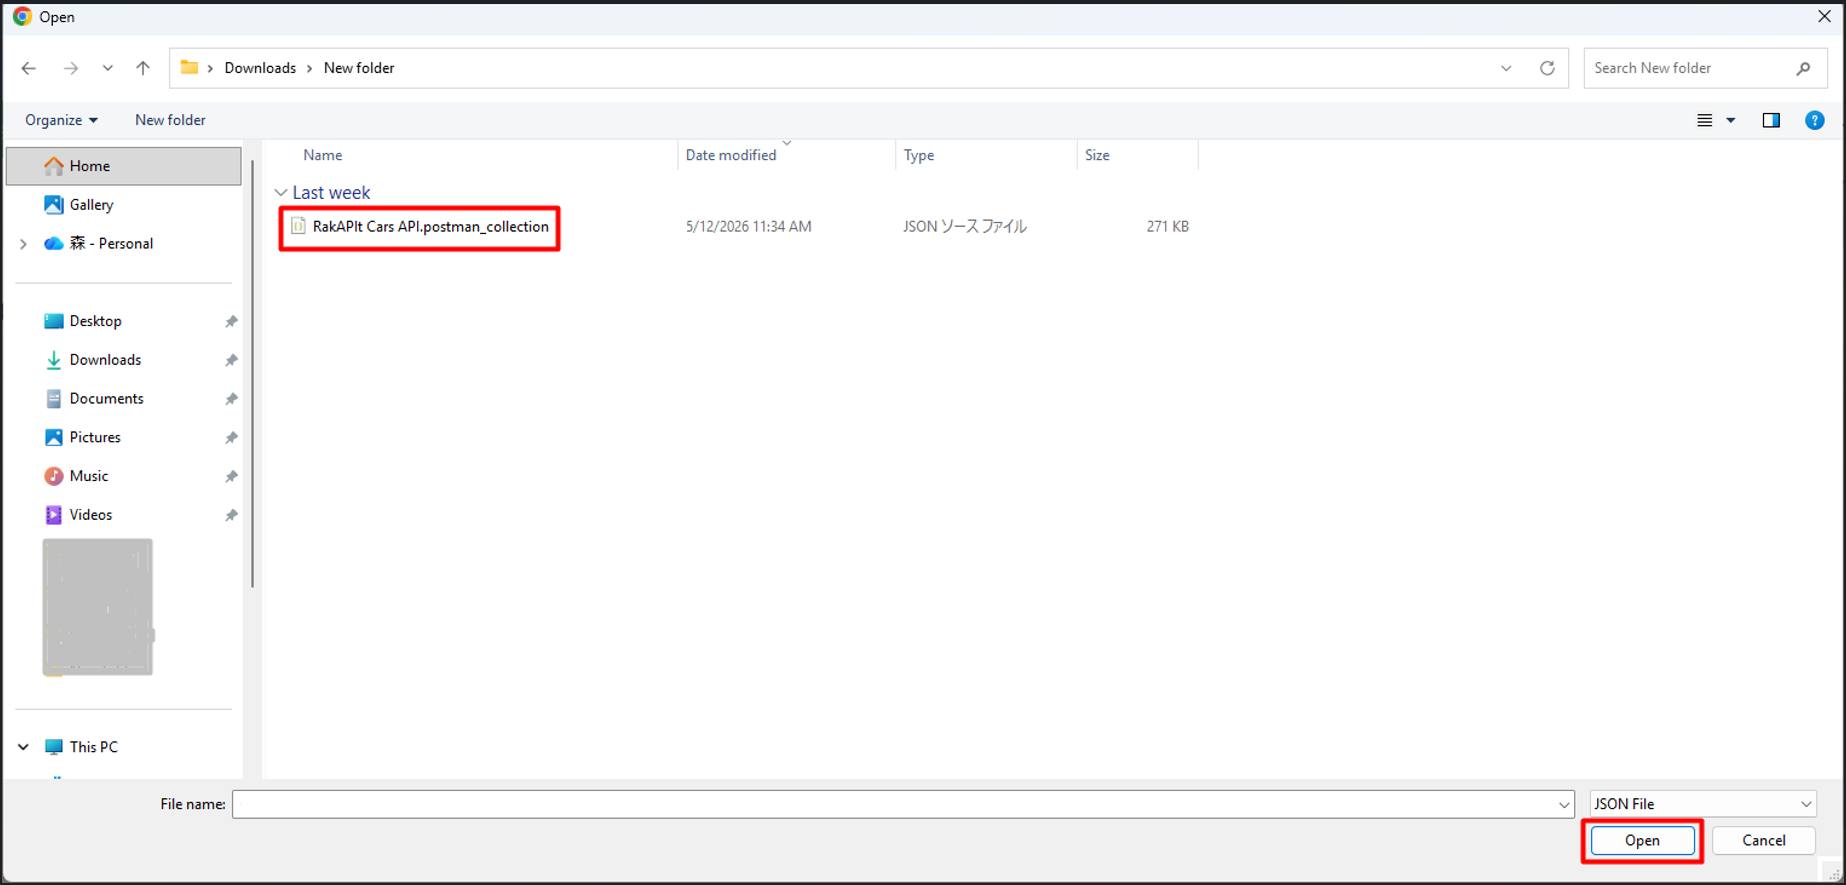
Step 3: Upload your Postman file (Collection v2.1 format).
-
Step 4: (Optional) Select the Test Objects to be created along with the Project.
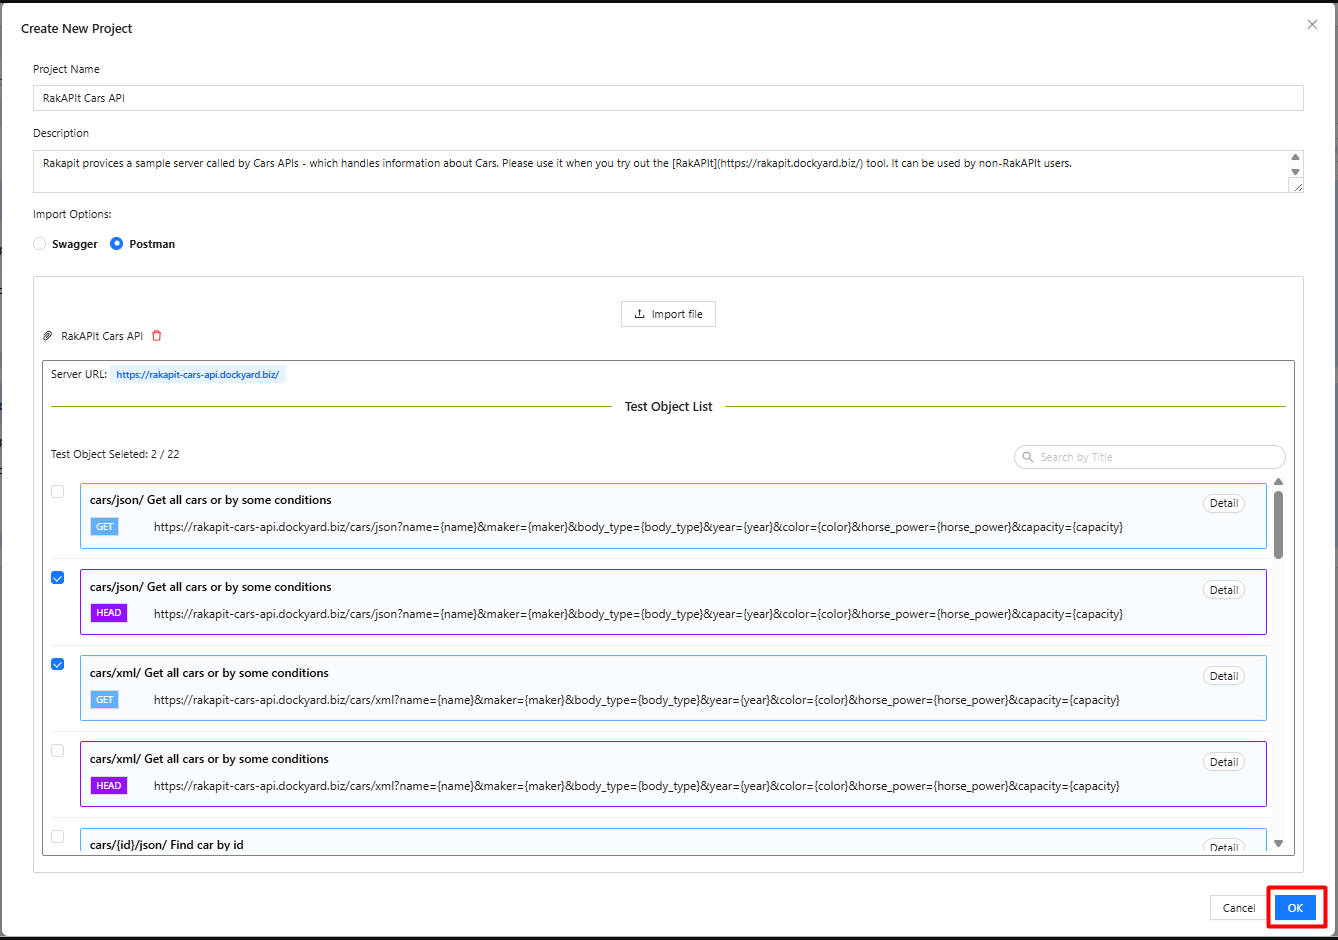
- Step 5: Click the OK button to start the import process.
Import Postman File into an Existing Project
You can update your existing project by importing additional Postman Collections.
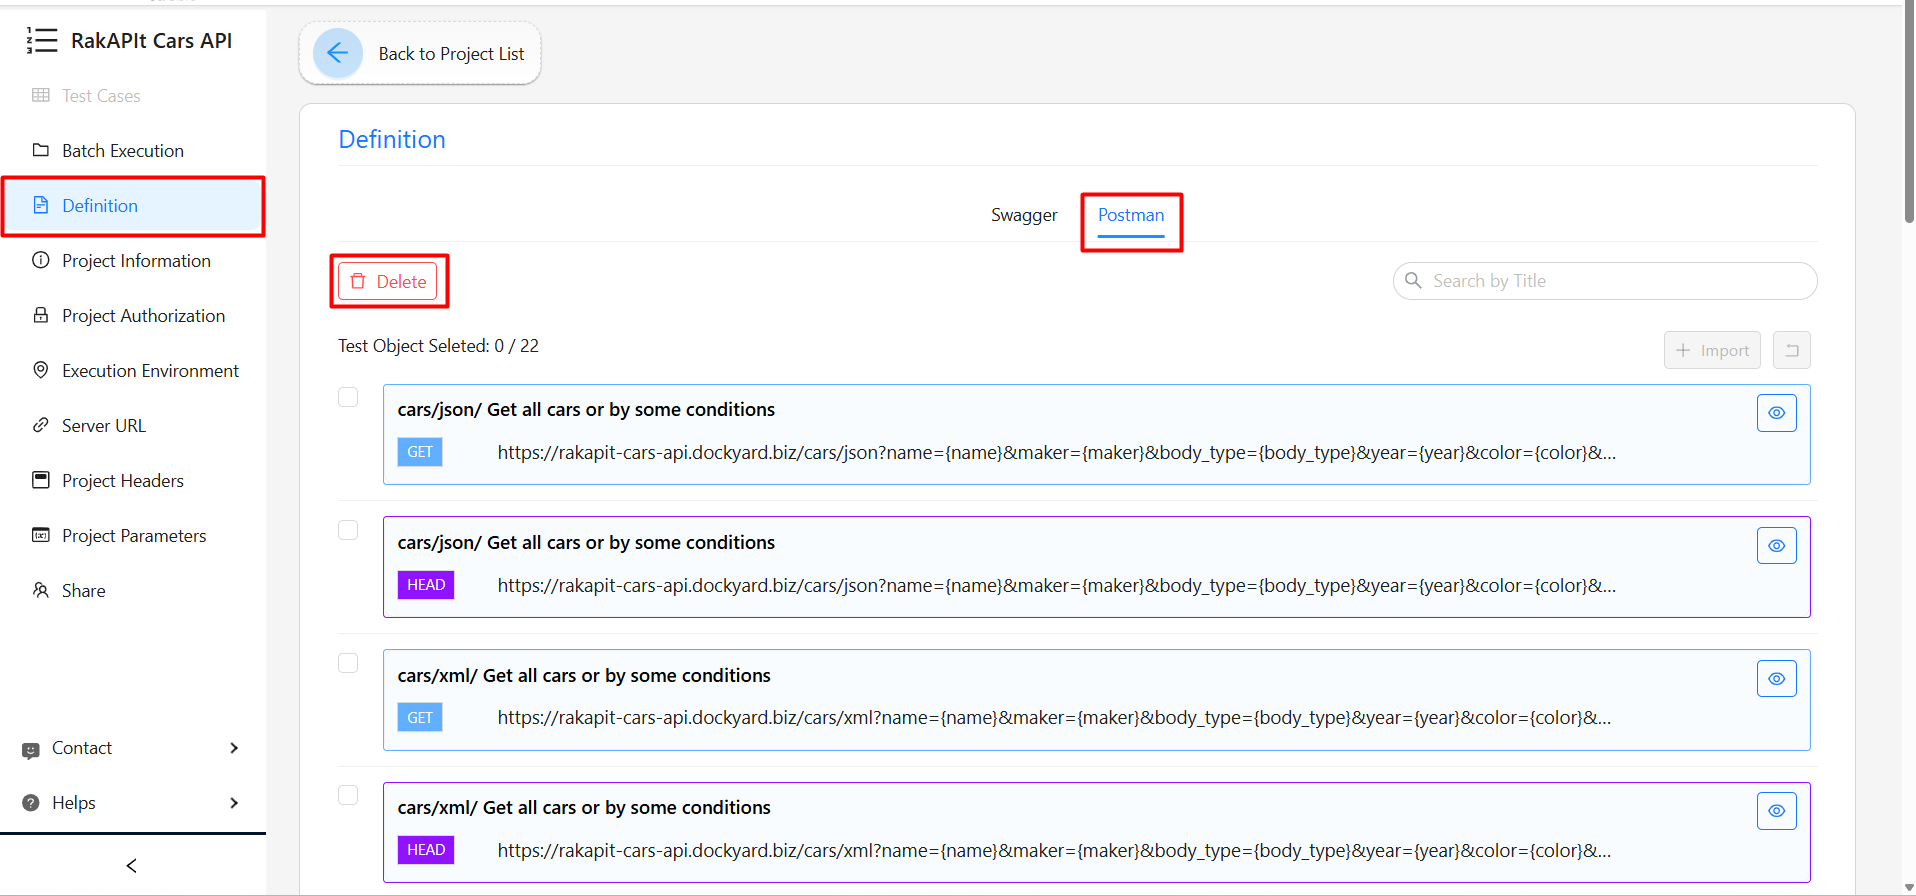
- Step 1: Select Definition and click the Postman tab.
-
Step 2: (Optional) If old data already exists, click Delete before importing new data.
-
Step 3: Click Import file to upload the new file.
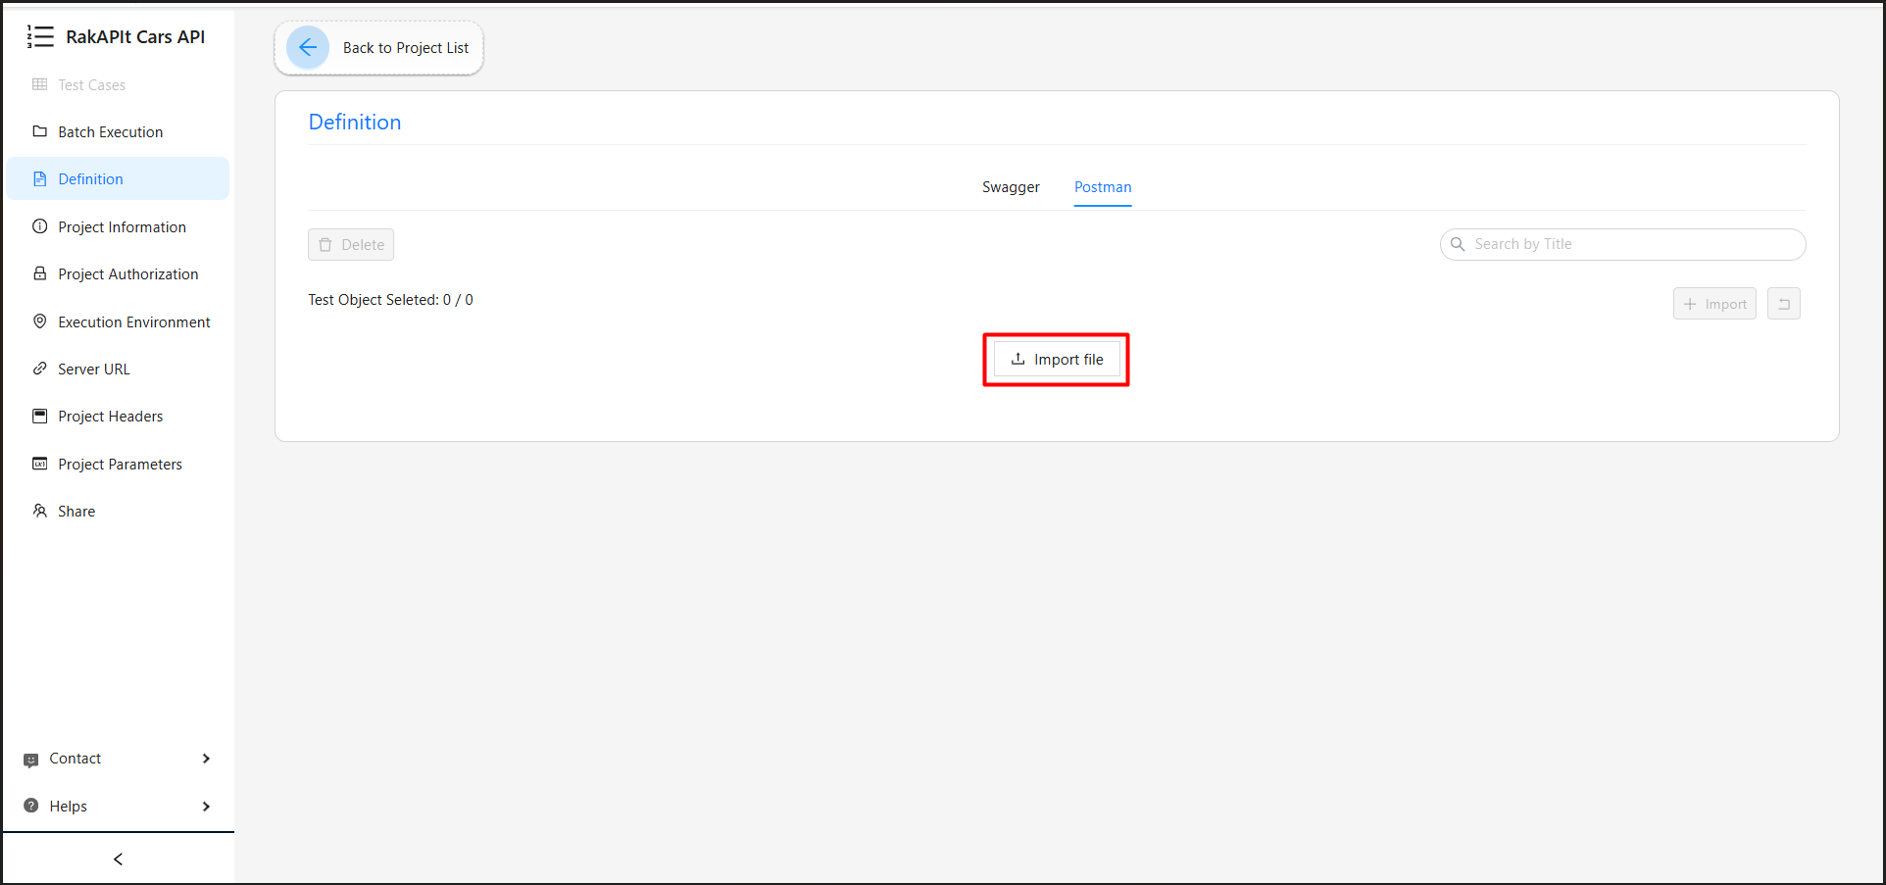
- Step 4: Select the new file you want to import to start the import process.
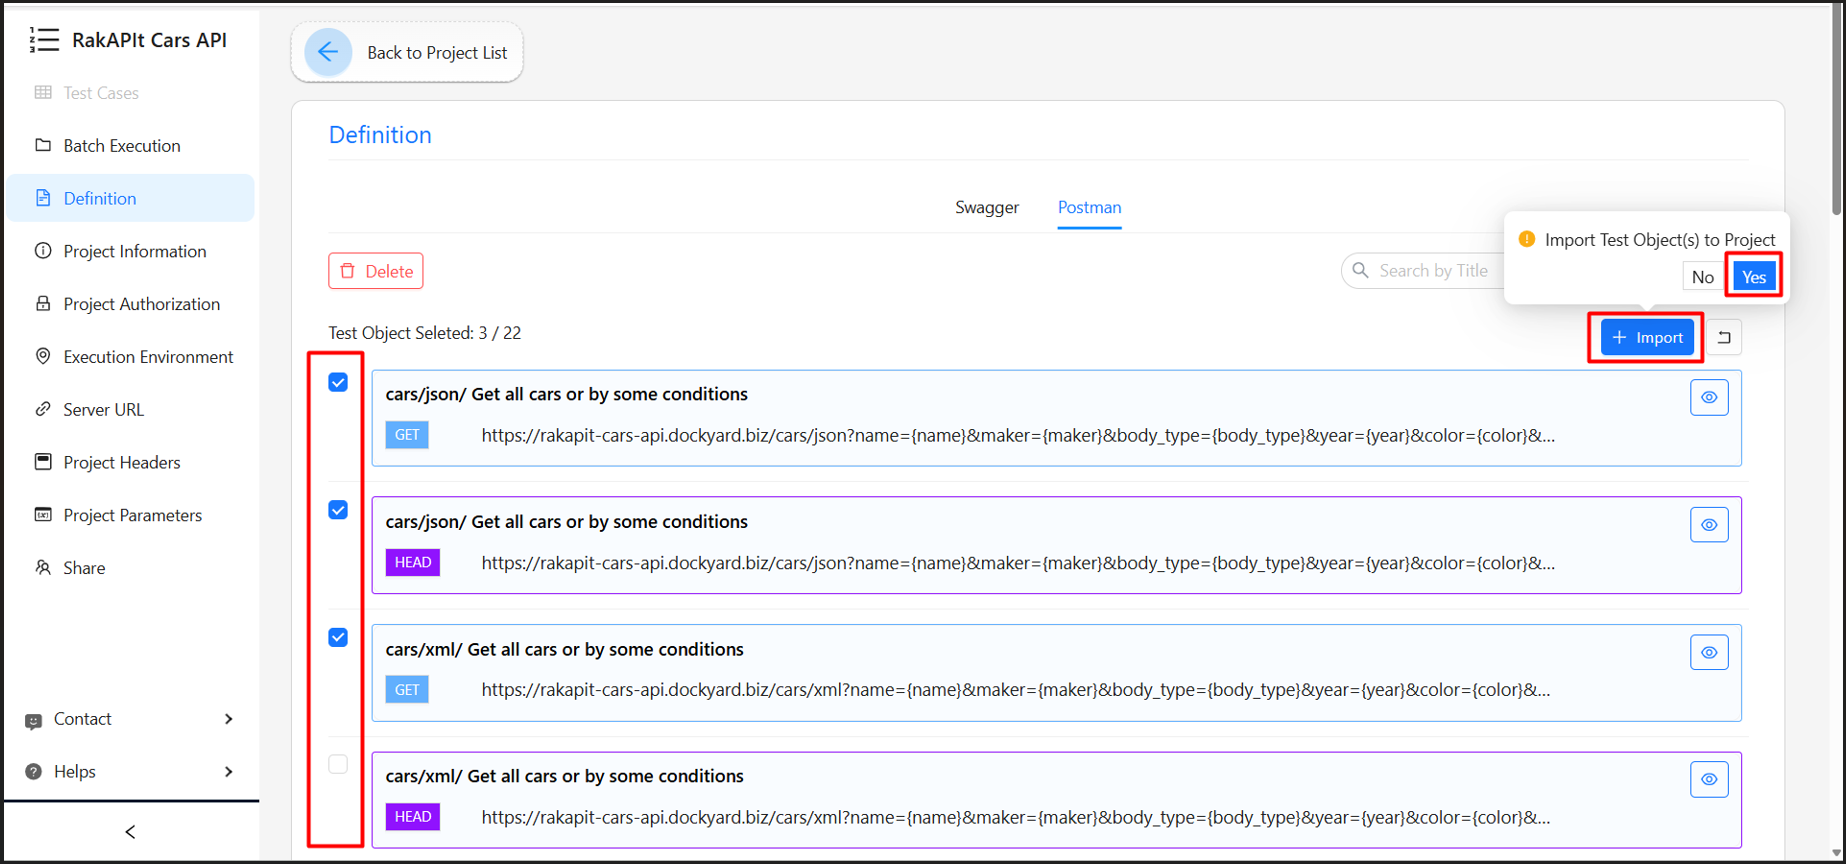
Create Test Objects from an Existing File
RakAPIt provides features that allow you to add new Test Objects and integrate them into your existing projects.
- Step 1: Click on Definition.
- Step 2: Select the Test Objects you want to add to your project.
-
Step 3: Click Import, then click Yes to start the import process.