
Tutorial
You can easily create Test cases and execute test in API testing with RakAPIt. Through RakAPIt's tutorial, you can understand how Rakapit conducts API testing.
1. Create Project
First, create a Project. You can import an OpenAPI file (Version 2.0 & 3.0) in your Project. You can easily create a Test Object from the API operation of OpenAPI.
This time we will use the RakAPIt Cars API.
- Step 1: Click the Create a Project card.
- Step 2: Enter Project Name
- Step 3: Enter Description
-
Step 4: Import Swagger file
Paste url of RakAPIt Cars API Swagger into the input to get information from the swagger。 - Step 5: Click 「OK」
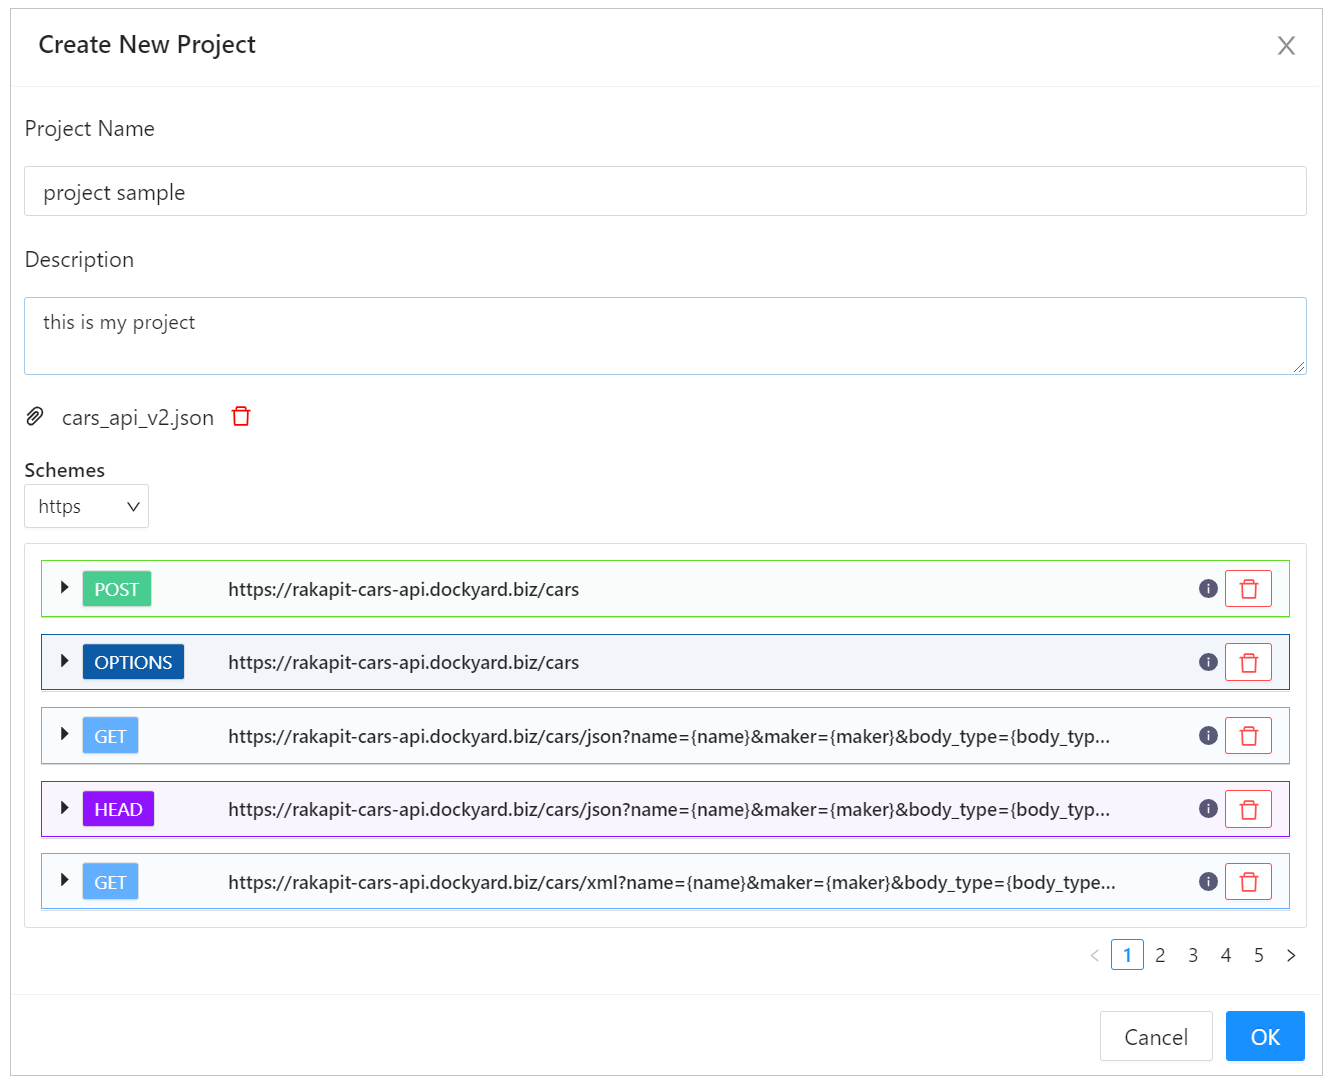
Create Project
2. Create Test Object
Next, create a Test Object.
-
Step 1: Click「+ Test Object」button to create Test Object.
To create Test Object based on Swagger Operation, click API Operation that you want to use in "Swagger Operation". This time, we use GET cars/{id}/json on the second page.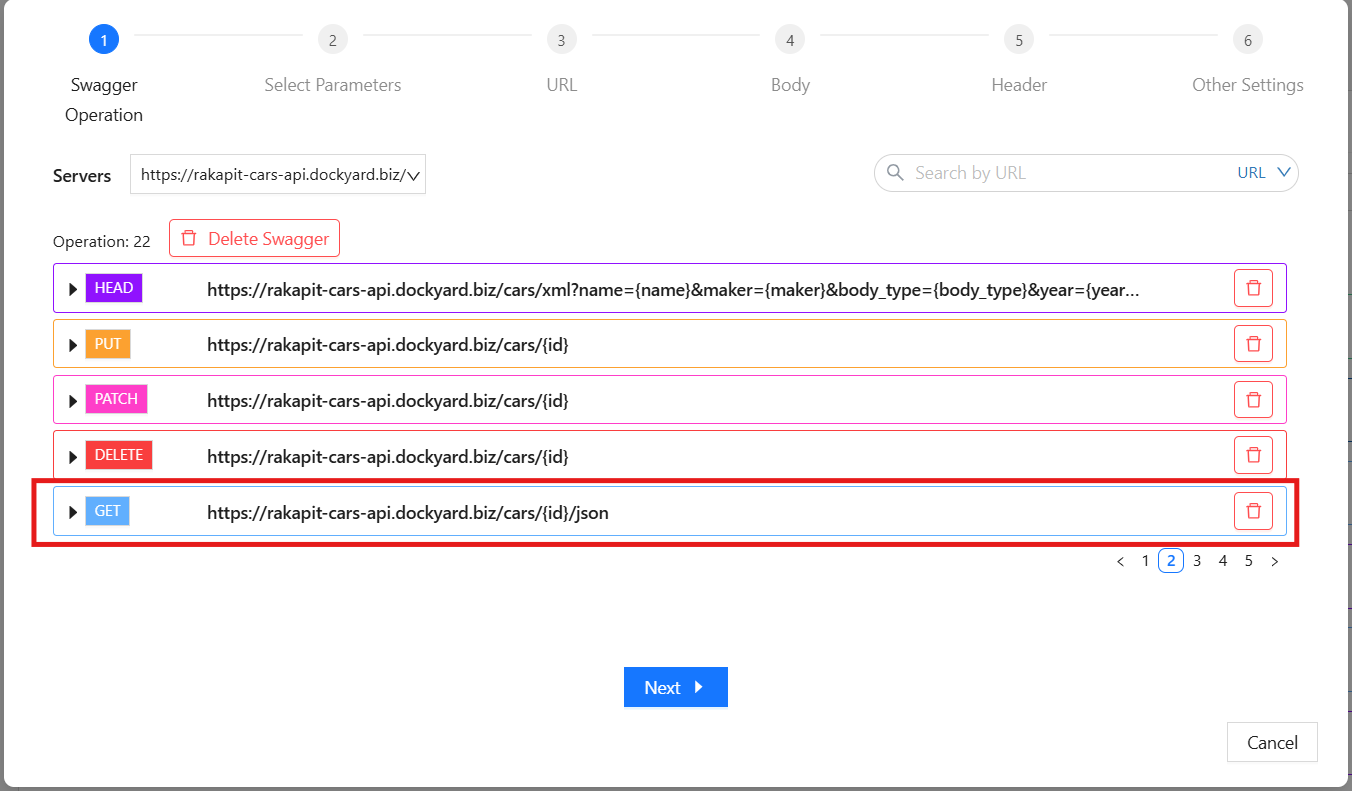
Create Test Object - Step 2: Select parameters that you want to focus on or click skip button to use all parameters
-
Step 3: Enter the basic information of Request by step.
Enter the required information for Method, API Endpoint, Header and Body. If you refer to the Swagger Operation, parameters can be automatically filled in.
This time, the Test Object is created based on the Swagger file, so the necessary information is filled in.
For each Parameter, you can enter the data patterns manually. If you refer to the Swagger Operation, data patterns can be automatically generated by the following steps:- Click 「>>」 (Generate Data Patterns).
- Select Parameter. This time, select id.
- Click 「OK」.
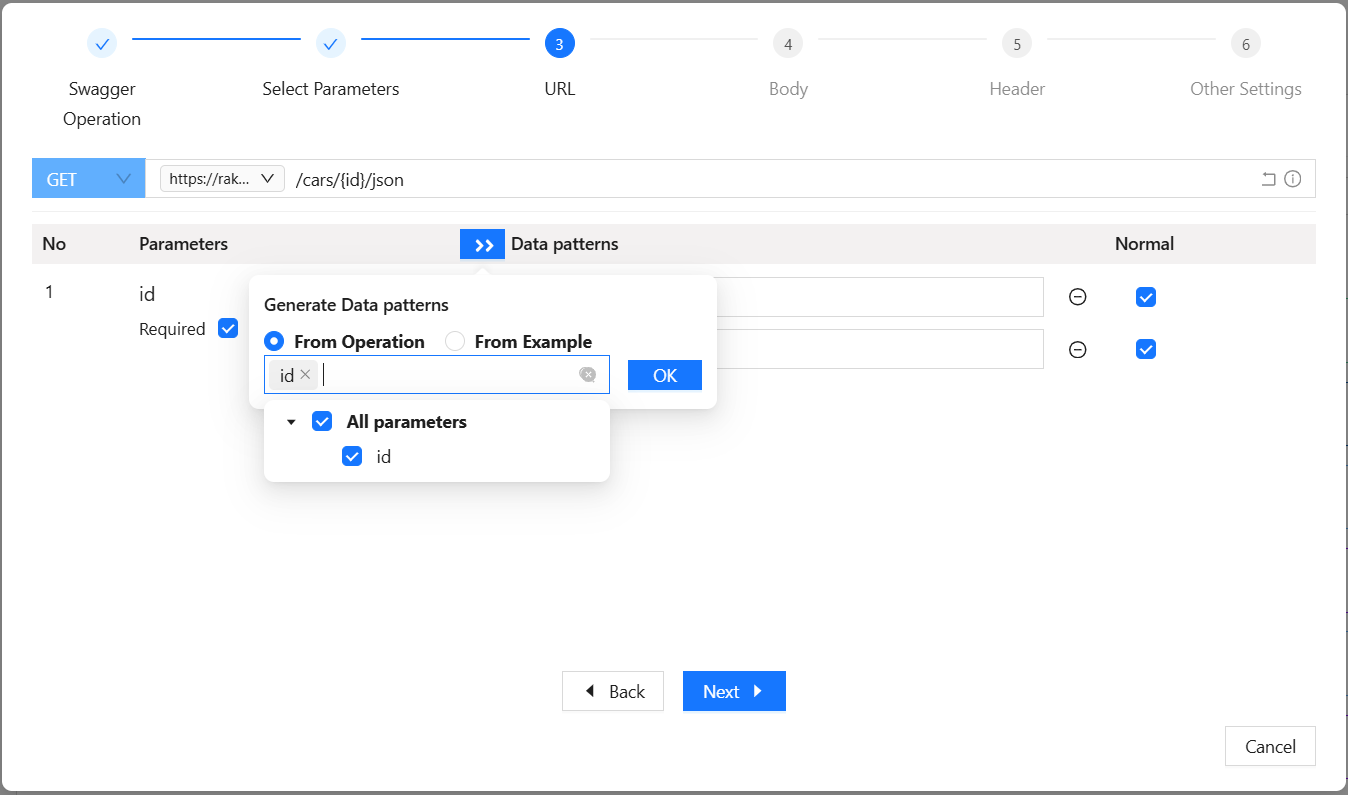
Generate test data - Step 4: Select Combination method.
- Step 5: Click 「Create」.
3. Execute Test cases
Executing selected Test cases. You can execute Test case in Test case table or in Test case detail.
-
Execute Test case in Test case detail
- Step 1: Open Test case detail modal.
-
Step 2-1: Click 「Send & Save Result」 to execute and save result to test case detail, or click 「Send」 to execute the test case without saving the result.

-
Step 2-2: In case you want to save result after click Send, click button 「Save Result」

- Step 3: Check the test result in the Test case detail.
-
Execute Test case in Test case table
- Step 1: Select the Test case(s).
- Step 2: Click Send & Save Result to execute.
-
Step 3: Check the test result in the Test case table.
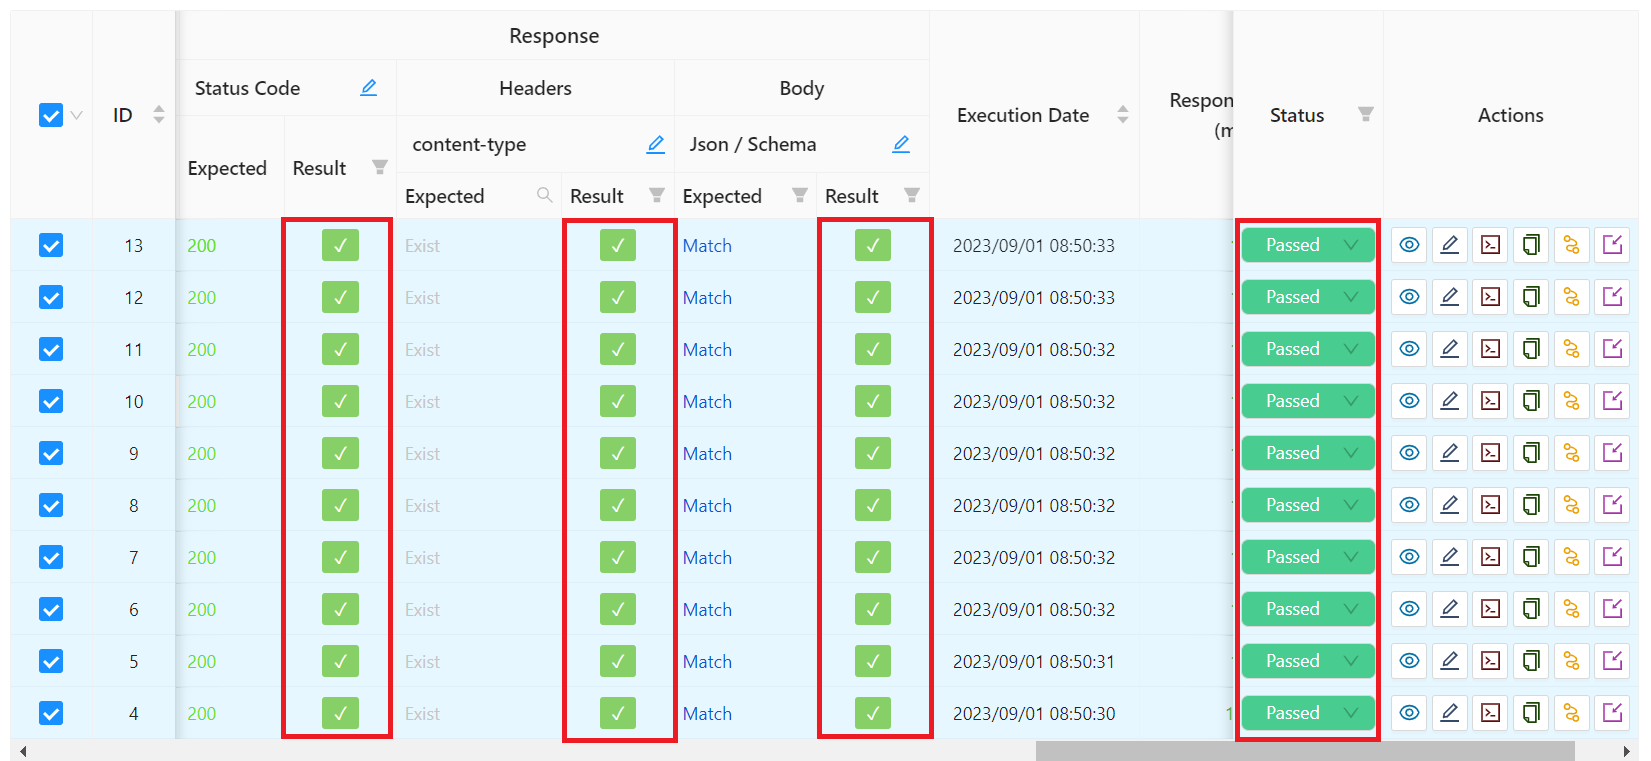
Test cases Screen
4. Generate Test cases automatically
You can create multiple Test cases at once by using Generate Test cases function.
To use Generate Test cases function, click the 「Generate Test cases」 button at the "By Response Code" tab or 「Generate Test cases」 in the 「More」 section at the "By Test Suite" tab.
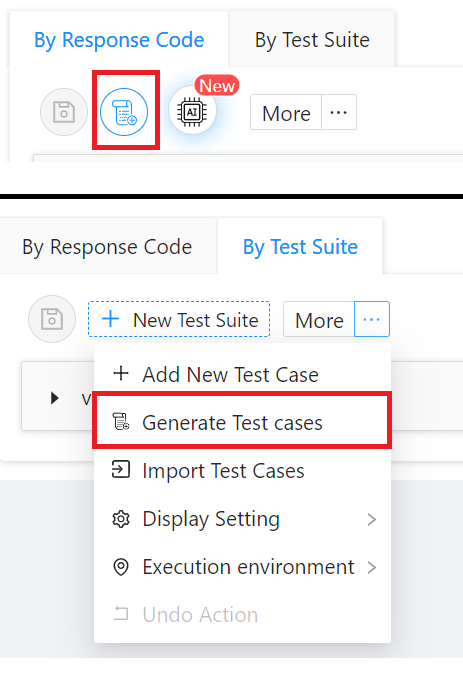
RakAPIt provide 5 method to auto-generate Test cases. In this tutorial, we will introduce how to use OpenAI to generating Test case.
- Step 1: Choose Generate Test cases by OpenAI method in 「Generate Test cases」 function or click the 「Generate Test cases by OpenAI」 button to open Generate Test cases by OpenAI modal.
- Step 2: Select parameters (1-1) and response code (1-2) that you want to focus on.
- Step 3: Click button 「Generate suggestions of test cases」(2) and waiting for OpenAI generate Test cases.
- Step 4: Select Test cases that you want to create, then click button 「Add Test Cases」(3) .
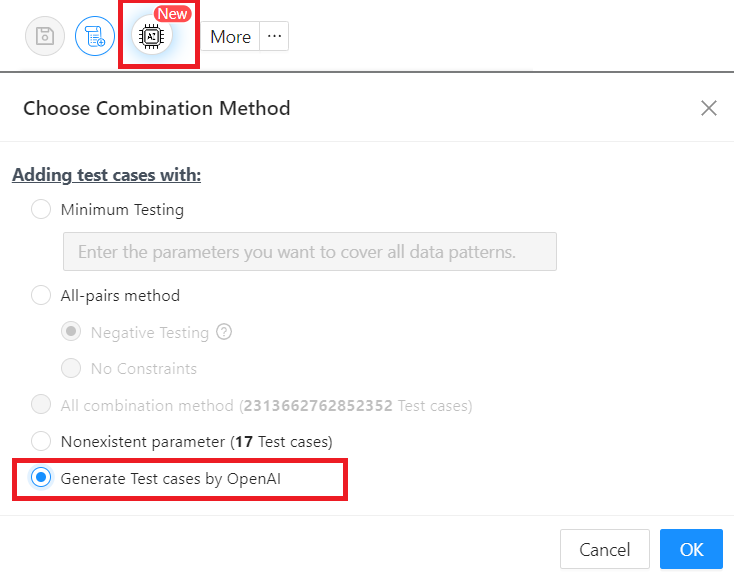
Open "Generate Test cases by OpenAI" modal
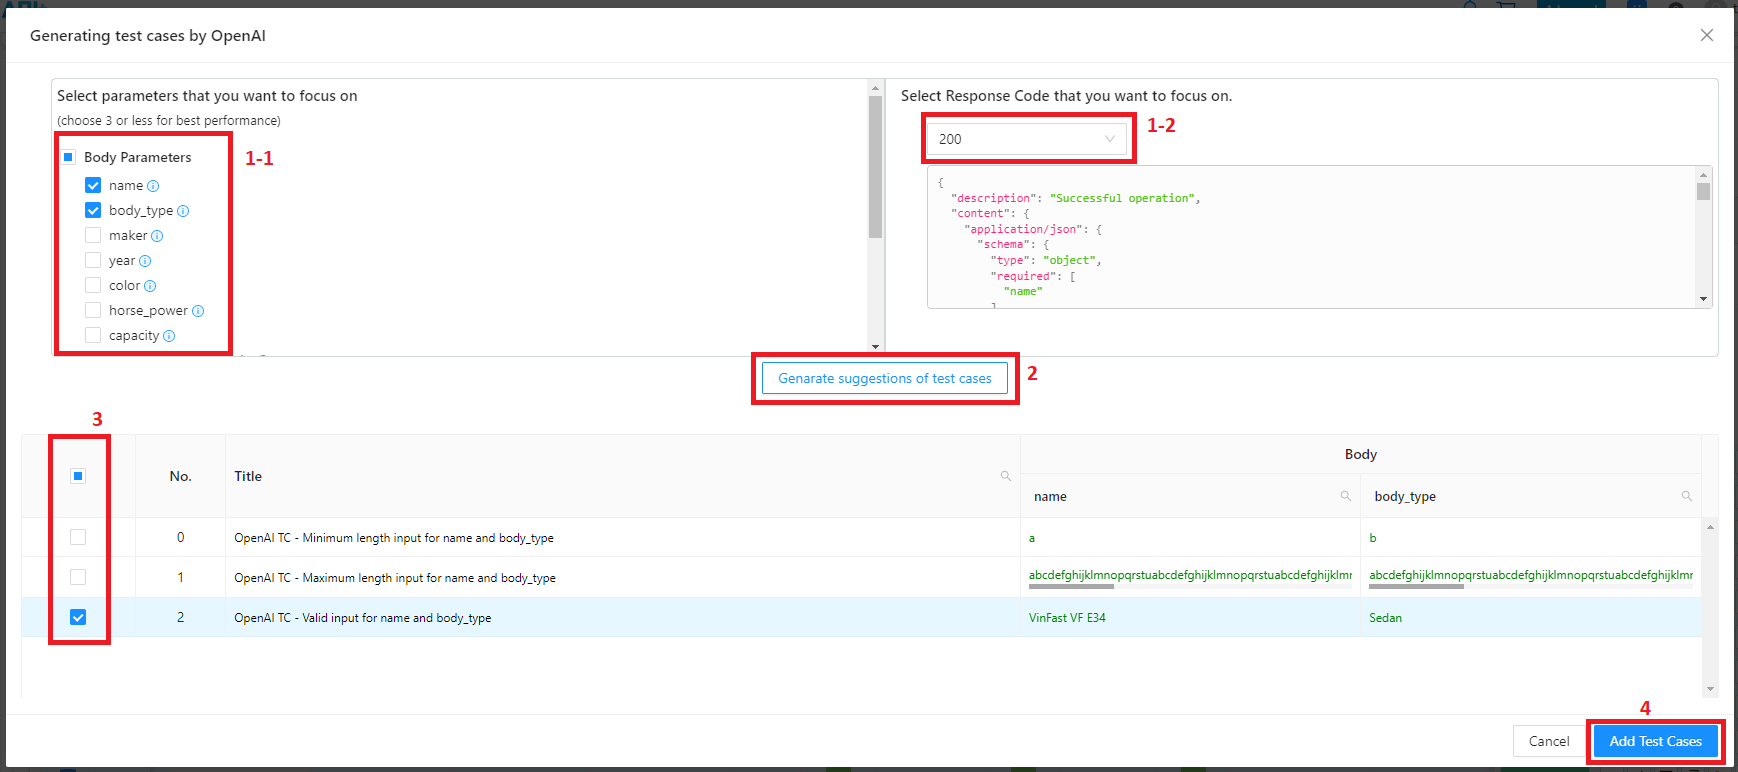
Generate Test cases by OpenAI modal
Now you can go through everything from test case generation to test execution. Please refer to each item for details.